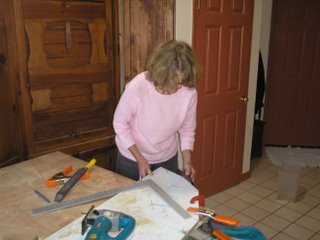
The steps to creating the center frame and forekeel of the Nutshell Pram are:
1. Cogitate.
2. Procrastinate.
3. Laminate.
Getting ready for step number 3 was similar to preparing for First Communion. Just like First Communion, I had to cover everything with plastic, mix up a batch of epoxy resin and hardener, don my white veil, and receive the sacrament. Now that I've done it once, I know how to swallow the host in one gulp and can return to the altar anytime I want. The main difference is that for laminating, you need a lot more clamps.
After ripping the strips of wood to be laminated, I made a dry run without the epoxy to make sure the jig would work. It didn’t. The triangular pieces of wood needed more than one screw each to stay put, so I sawed, drilled, and screwed in more blocks until everything was fast. But wait, I needed more clamps. Always need more clamps, so off to OSH I went and returned with half a dozen cool, sexy C-clamps, and a couple of bar clamps for good measure. After another dry run, which succeeded, I set the altar of laminating: the epoxy resin and hardener, measuring cups, mixing bowls, stir sticks, sponge rollers, rubber gloves, a rubber mallet for pounding the strips flat, a score of clamps, two helpers (a husband and a son), and a protective covering of plastic over everything within a 20-foot radius of the communion rail.

I mixed the resin and hardener and stirred for a full five minutes, as instructed, and delivered the mixture in a chalice to Father Cary. He rolled the glue onto the strips, which I held flat and then placed onto the altar, I mean jig. All was going well until we were about halfway through and the glue started to set. Then it was all over because once it starts to set, it goes really fast. Unfortunately, I had mixed way too much epoxy before we could spread all of it onto the strips, so about $30 worth of glue hardened into a solid rock.
Parker and I went ahead and clamped the strips that we had prepared for the center frame. I mixed another, much smaller batch of glue and laminated the strips of wood for the forekeel. We clamped those onto the jig. Three days later, I checked them and they turned out fine! On the fourth day, I created the center frame. (This is a very religious process). This time, I did it myself, with no help from the male sector, or maybe that should be
sextor.
So, in a nutshell (little joke), here is an epoxy primer:
1. Read the directions on the cans of resin and hardener
before you begin.
2. Measure a small amount of resin and hardener
precisely into a mixing bowl.
3. Stir thoroughly for 5 minutes.
4. Pour mixture into a shallow container, such as the small paint tray that comes with the small rollers. The key word here is
shallow, because a chemical reaction occurs that generates heat, and the heat speeds the reaction. You want to dissipate the heat to slow the reaction. My problem was that
(a) I didn’t read the directions, and
(b) I had mixed the glue in a deep container. When it started to set, I plunged my rubber-gloved hand into the mixture and nearly burned my fingers off. This stuff can actually burst into flames!
5. Ignore anything your husband says to you.
6. Drink heavily when you’re done.
Luckily for me, I was already really good at numbers 5 and 6. The good news is that the whole laminating process wasn’t as difficult or even as messy as I had envisioned. Now that the laminating part is done, I am in the state of grace and can proceed with the actual boatbuilding.


