Thursday, March 30, 2006

Poars and saddles

In San Francisco, there is a maritime museum that has a small boat workshop where they conduct classes. I have registered for a class in June and July called "Oars, Spars, and Paddles," although usually I call it "Oars, Pars, and Spaddles." Kind of like "bales of hay" always comes out "hales of bay." Anyway, I'm hoping to make the spoars and pardles for my nutshell pram in class. Perhaps by then I'll have my new digicam so I can begin on the documentary film portion of this New Year's challenge. As you may or probably don't recall, this is a 3-pronged project: the boat, the blog, and the blockbuster.

Blonde Logic

This project has fueled my enthusiasm for building the full-size nutshell pram. Among my newly-acquired boatbuilding-but-not-numchuk skills is the knowledge that I can build it in a different order than the instruction book says. This is blonde logic at work! For my springtime endeavour, I am going to work on the tiller, the rudder, the daggerboard everything (case, case cap, etc.), the seats, and the mast step. By the time I finish all those pieces, summer will be here (assuming this incessant rain ceases) and I can begin on the hull. Then, when I finish the hull, all I have to do is install the seats and the daggerboard assembly, and I'm ready to launch!

Paintium, ad nauseum

My boat is almost finished! I'm painting it, which is nearly as time-consuming as building the boat itself. Sand, paint, sand, paint, sand, paint, sand, paint, ad nauseum, ad infinitum.

Building this model boat is one of the few smart things I've ever done. It has taught me skills -- not numchuk skills, but boatbuilding skills. It also enabled me to make mistakes on a small scale rather than on a grand scale like I usually do. Now, when I build the life-size nutshell pram, I'll know to paint it as I go along, rather than waiting until the end when it's a big pain in the patootie. It's difficult at the end because the seats are varnished, the interior planks are painted white, the interior bottom is beige, and the outside of the boat is painted white, except for the sheer plank which is green. Pop quiz again, in case you failed last time: What is a sheer plank?

The spars, the tiller, the daggerboard case cap and the daggerboard cap are all varnished. The varnish takes forever to dry, and you're supposed to sand and varnish several times, but at this point I think two coats of varnish are plenty. Is plenty?

Tune in next week for a photo of the saltiest little boat on Searles Way.

Thursday, March 23, 2006

Case closed


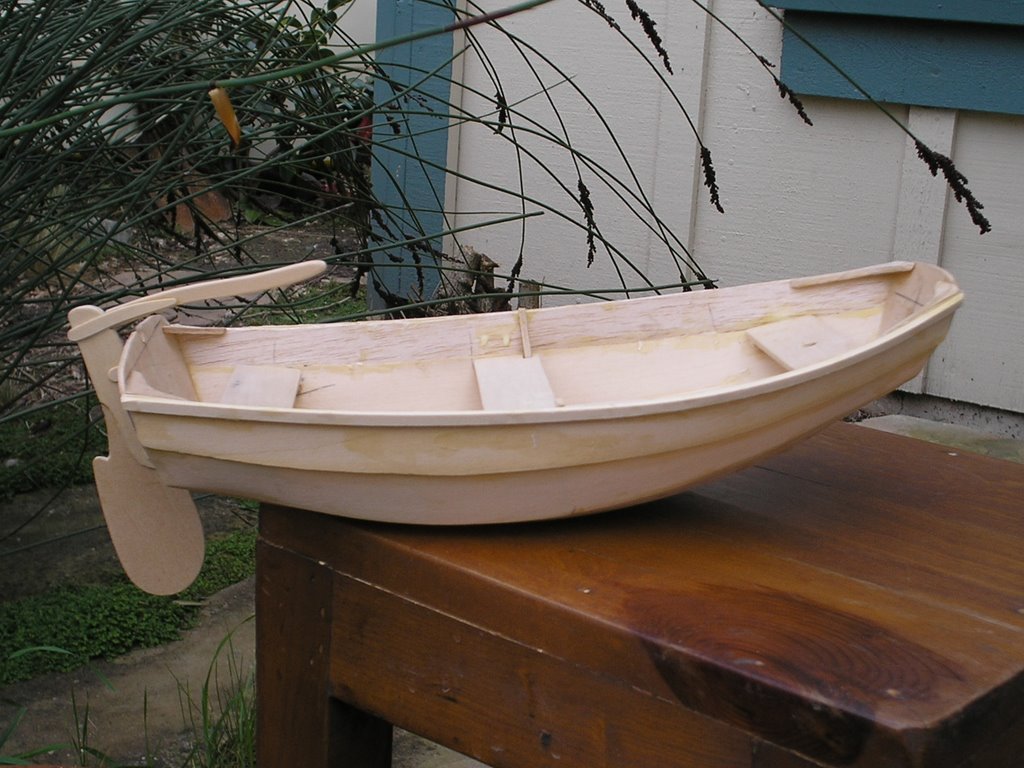
My boat is nearing completion! The most difficult aspect of building this model has been to decrypt the instructions, which are frustratingly vague, at least to a blonde. Here's what I've done in the last week:

1. I made the daggerboard case, the case cap, the daggerboard, and the daggerboard cap. The daggerboard, also called a centerboard, is a rudder type thing that sticks down below the center of the boat. It stabilizes the boat for sailing. The daggerboard cap is just a piece of wood on top of the board that holds it in place inside the daggerboard case. The case is the slot through which the daggerboard slides through the bottom of the boat. The case cap is a cover that goes over the case when the daggerboard is not inside it.
Part of this project required cutting a slit in the bottom of the boat, which scared me, but it turned out to be easy.


2. I made the mast step, which is a tiny piece of wood that is placed below the forward seat and into which the mast for the sail sets. The mast step and the forward seat each have a hole in them through which the mast slides and which have to line up. Let's hope I lined them up correctly!

3. I glued the seats in place: forward, middle, and aft. I probably re-cut each seat at least twice because of screw-ups.

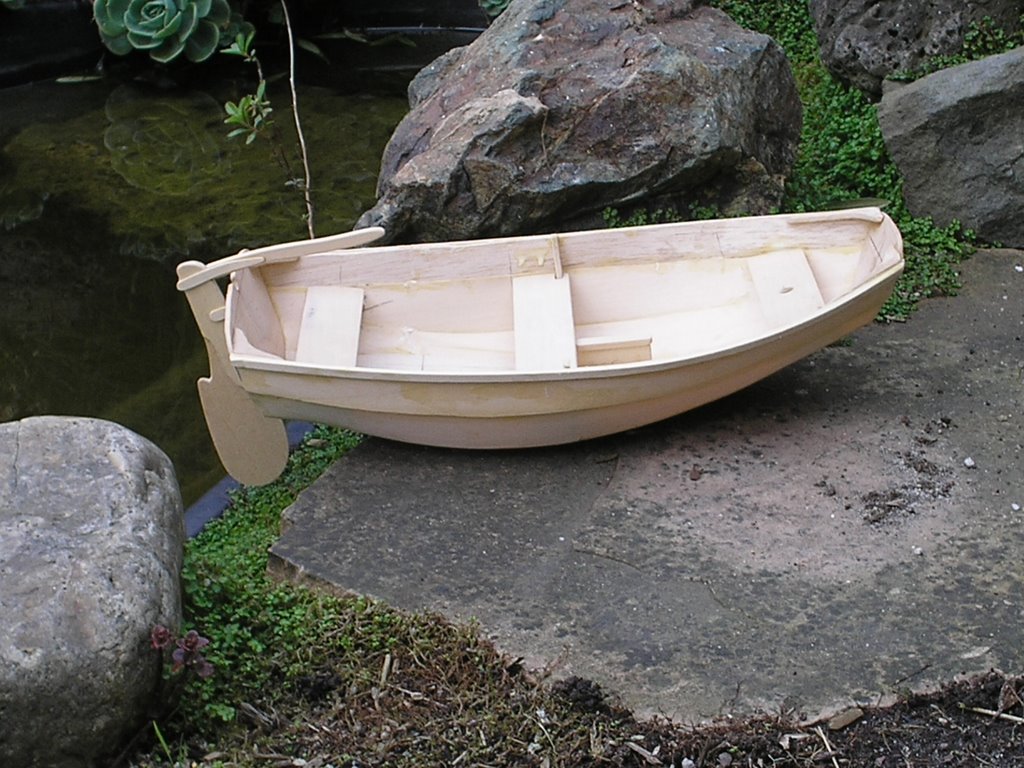
4. You should see my cheeks! The rudder and the tiller both have cheeks, very sweet. On the tiller, the cheeks are the extensions that attach to the rudder. On the rudder, the cheeks cover the top half of it and are embraced by the tiller cheeks.

For my next act, I will create three spars: the mast, the yard and the boom. They all connect to the sail, or the sail connects to them. I also have to make the sail. Next I paint the boat, and it's done. The plans include directions on how to build a cradle for the boat, a cradle being a set-up to display the model, but I have an alternate plan. I'm going to moor it in my backyard pond.

Thursday, March 16, 2006

The case of the daggerboard trunk

Progress on the model nutshell pram has slowed in the last month because I've come to a stage in the construction that is a real pain, and the instructions are particularly vague. The way I've dealt with the situation is to ignore it, but one of my bleaders e-mailed me and wanted to know what on earth was going on. Is this what a blonde does when the going gets tough? (Yes.) Furthermore, she wanted to see more blonde jokes. (No problemo.)

Here is what I've accomplished in the last four weeks:
1. Installed the forward and stern quarter knees. These are decorative doodads, fore and aft, that on the model are about the size of an eyelash. In fact, everything left to do on this boat involves pieces that are about the size of an eyelash. I am looking forward to building the full-size boat so I can see what I'm doing.

2. Glued guardrails to the top edge of the sheer plank. Pop quiz: What is a sheer plank?

3. Made the seats -- fore, middle, and aft. This part of the project called for all kinds of nonsense involving seat-support blocks, marking the hull, and beveling, which I started to do until I determined that it was completely unnecessary for this miniature version of the boat. The seat-support blocks are the size of matchsticks, and because no one heavier than Stuart Little will be sailing this boat, and no one with x-ray vision will be looking at it, I decided to glue the seats in place sans supports. Let's just hope that Stuart hasn't put on a lot of weight.

4. Started work on the daggerboard case. Whoever wrote the instructions has a great sense of humor. The opening sentence of this section is, "One of the more meticulous parts of your project will be assembly and installation of the daggerboard case." Then he starts talking about the trunk, never letting on that the words "trunk" and "case" are interchangeable. It took a blonde to figure that one out! Typical sentences in this section are, "Notch the endposts below the bedlogs, where they will pass through the model's bottom, about half their width as shown on the construction profile drawing." It sounds like too-much-information regarding a girl's rear-end.

Blonde joke #3


This could have been my son's test.